Tutorial
The tutorial or crash course is intended to introduce you to a number of basic necessities that will get you up and running quickly to start notating your own music. If you're using MusiCAD for the first time (see getting started) it is a good idea to first enter a simple melody on a single line. If you manage to do that smoothly, a piano part or other two-part score would be next. To get an idea of the possibilities, check out the supplied examples.
You can always find out more about an item by clicking on a link in this help information. The 'previous' button shows you the previous topic again.
If you take this quick course step by step on your own computer, entering and changing notes should no longer cause major problems.
Let's start:
- Hover the mouse over a picture at the top of the screen (a 'button' of the toolbar) without clicking.
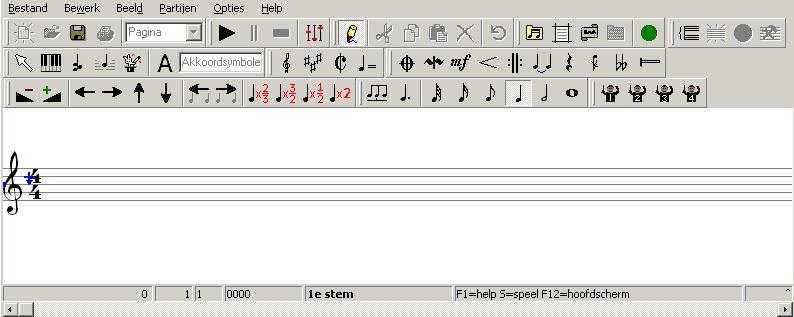
- Create a new melody with <ctrl-N> and enter a title, the desired key, time signature and kind of part or score - let's go for a single part in treble clef: [Part|single part treble clef].
- On the notation bar you see now, make sure that clicking the mouse enters notes by turning on the style button

- there will be a red note alongside the mouse cursor
- Click on the staffline
- A note with the previously selected duration appears - so you can enter notes with the mouse.
- Type <
 ><Enter><
 ><
>< ><Enter> and two more notes will appear with the same duration but different height.
- fastest way to enter notes: with keyboard
- Type <Backspace>
- the last inserted thing disappears again.
- Press <+> and <-> several times
- Click
 on the button bar or to choose 1/8 notes as the default duration. The <8> key has the same effect. Create a measure full of 1/8 notes by clicking until a barline appears.
- Press <
 > and <
 >
>
- you move the note cursor through the music this way.
- Press the button
 in and move the cursor with <
 > between a few notes and insert a few new notes.
- All notes you enter will be inserted at the cursor position: the insert mode."
- Press <F7> and <F8>
- the note duration of the designated note halves/doubles
- Press <F6> and <F5>
- a dot appears after the note that disappears after <F5>
- Turn the button
 off, move the cursor between a few notes with <
 > and again insert a few new notes.
- All notes you enter will be superimposed over the existing notes: the overwrite mode, deleting notes and changing duration affects the rest of the bar).
- Type <r> <R> and again <R>
- rest enter and change to note and vice versa
- Click on the second note, click on the button
 and choose a barline from (click).
- You now know how to make a pickup
- Click the text selection box and choose "Lyrics 1". Click on the third note, and type This is text<Enter>
- You now know how to place text. Note that entering notes with <Enter> will only work if text entry mode is off.
- Press the Green button
 to use the default settings while editing.
 - To undo the last change undo, click on the toolbar on
 or type <alt-Backspace> or <ctrl-z>.
 - Check visual help to see where you can quickly find more information.
- Type <Esc> to exit the notation bar, or press the edit button (with pencil)
 . It is likely that an error message about out-of-measure notes and/or an incomplete measure will appear. After [OK] or <Enter> MusiCAD moves to the measure on the score bar containing the error. After [Cancel] or <Esc> you get the typed music with error on your screen.
If you have completed the crash course as an introduction, you can find additional information below:

